Chatroom provides real-time interaction service via text, emoji or custom stickers so that you can interact with your users through chatroom during live event.
If you need chatroom, please mark the checkbox in Chatroom section when you create a live event.
Note: it is necessary to integrate with your existing membership before utilizing chatroom. Please look into Integrate with your existing membership to live event for more information.
1. Click "Control room" button in the left sidebar and all the created events will be listed.
![]()
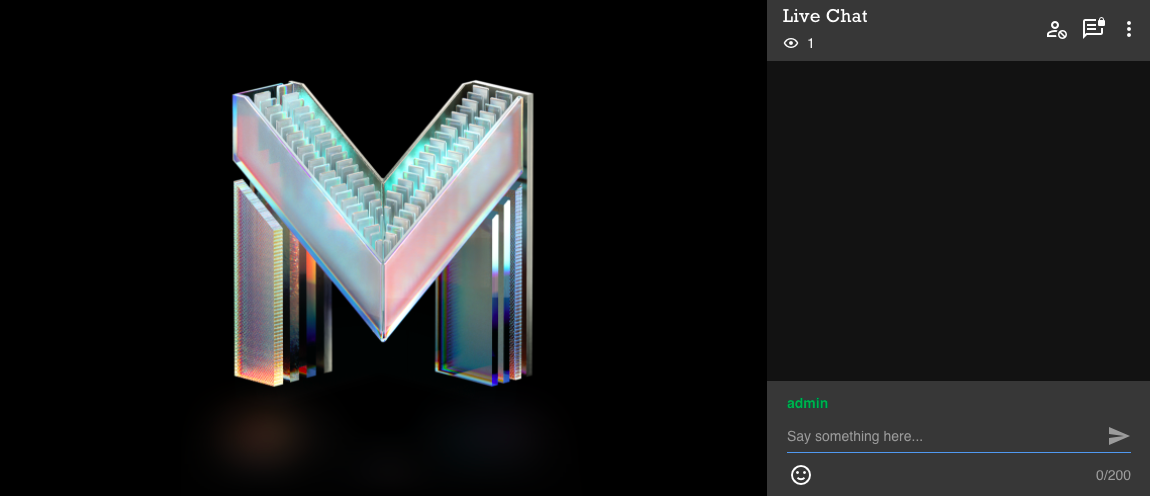
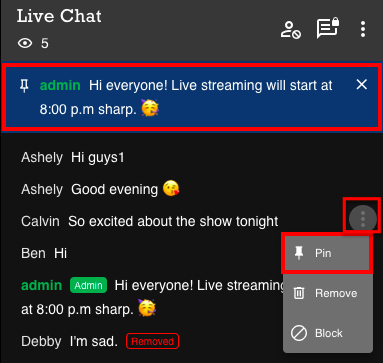
2. Click the event you want to manage chatroom and then you will find chatroom next to KKStream player. You can send a message at the bottom of chatroom.
3. As an admin user, you can manage the following features:
- Show/hide real-time user count to your users (default= hide user count):
-
- Find the function by clicking the "More" icon.
-

-
- Click "Hide user count" to hide the number from your users.
- Click "Show user count" to show the number to your users.
-
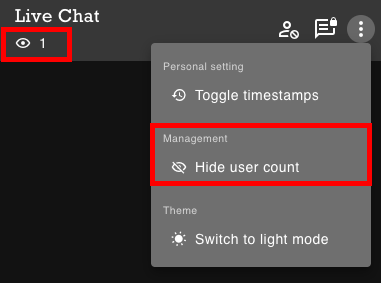
The number will be updated every 1-2 seconds and it’s based on how many live streaming pages are being opened.
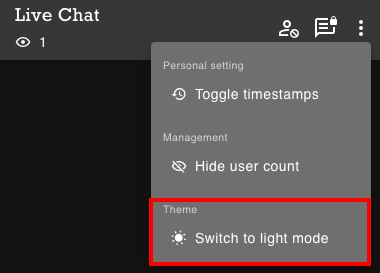
- Switch between light/dark mode (default= light):
- Find the function by clicking the "More" icon.
-
-
- Click "Switch to dark mode" to change to the dark theme.
- Click "Switch to light mode" to change to the light theme.
Note: If the theme is changed after your users open the live streaming page, the users will have to refresh the page to adopt the change. It is recommended to select and confirm a theme before the event starts.
-
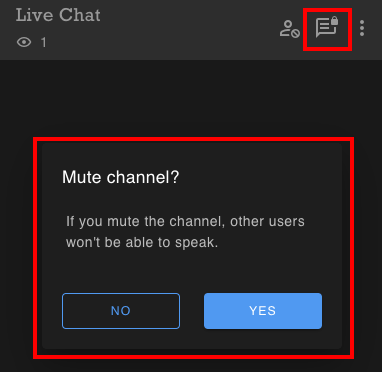
- Mute chatroom: Click the "Mute" icon to mute or unmute the chatroom. If you mute the chatroom, only the admin user can send messages.
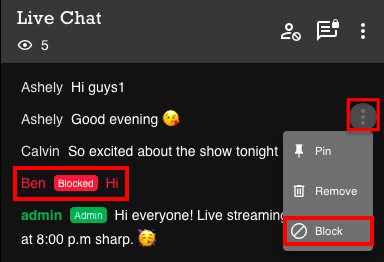
- Block a user:
- Click the block icon in the "More" icon next to the user's message.
-
- After a user being blocked,
-
- The admin user can still see the messages from the blocked user.
- The blocked user can still see the messages from himself/herself.
- Other users can’t see the messages from the blocked user.
-
- After a user being blocked,
-
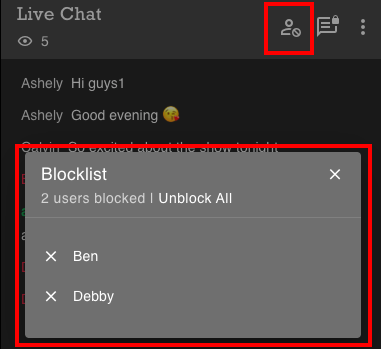
- Unblock: Can unblock users via the blocklist management or with the unblock icon in the "More" icon next to the user’s message.
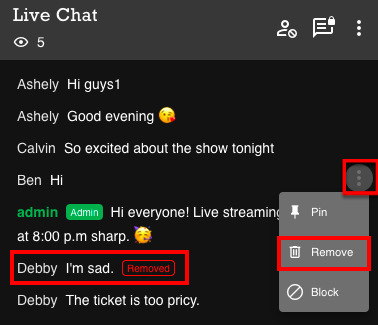
- Delete a message:
- Click the remove icon in the "More" icon next to the user's message.
- After a message being removed,
- The admin user can still see the removed message.
- The user who sent the removed message can still see the removed message.
- Other users can’t see the removed message.
Important: A removed message can’t be retrieved.
- Pin a message:
- Click the pin icon in the "More" icon next to the user's message.
- Only one message can be pinned at a time. If you pin another message, it will replace the first one directly.
- Unpin: Click the "X" icon next to the pinned message to unpin the message .
- A sticker message cannot be pinned.
Note: A pinned message will only display 2 rows regardless of the string length. Clicking on the pinned message to expand panel and view complete message.
4. As an admin user, you can also assign and enable custom stickers to a specific event. Go to the event control room and find the "Stickers" tab. Under the tab, you will see all the custom stickers uploaded by the accounts belonging to the organization. Please follow the next step to upload the custom stickers.
Use the toggle to assign and enable certain sticker groups to the event. There is no limitation on the number of custom sticker groups for an event.

Note: It is recommended to assign custom sticker groups for events before going live. If the assignment of custom sticker groups is changed after your users open the live streaming page, the users will have to refresh the page to adopt the change.
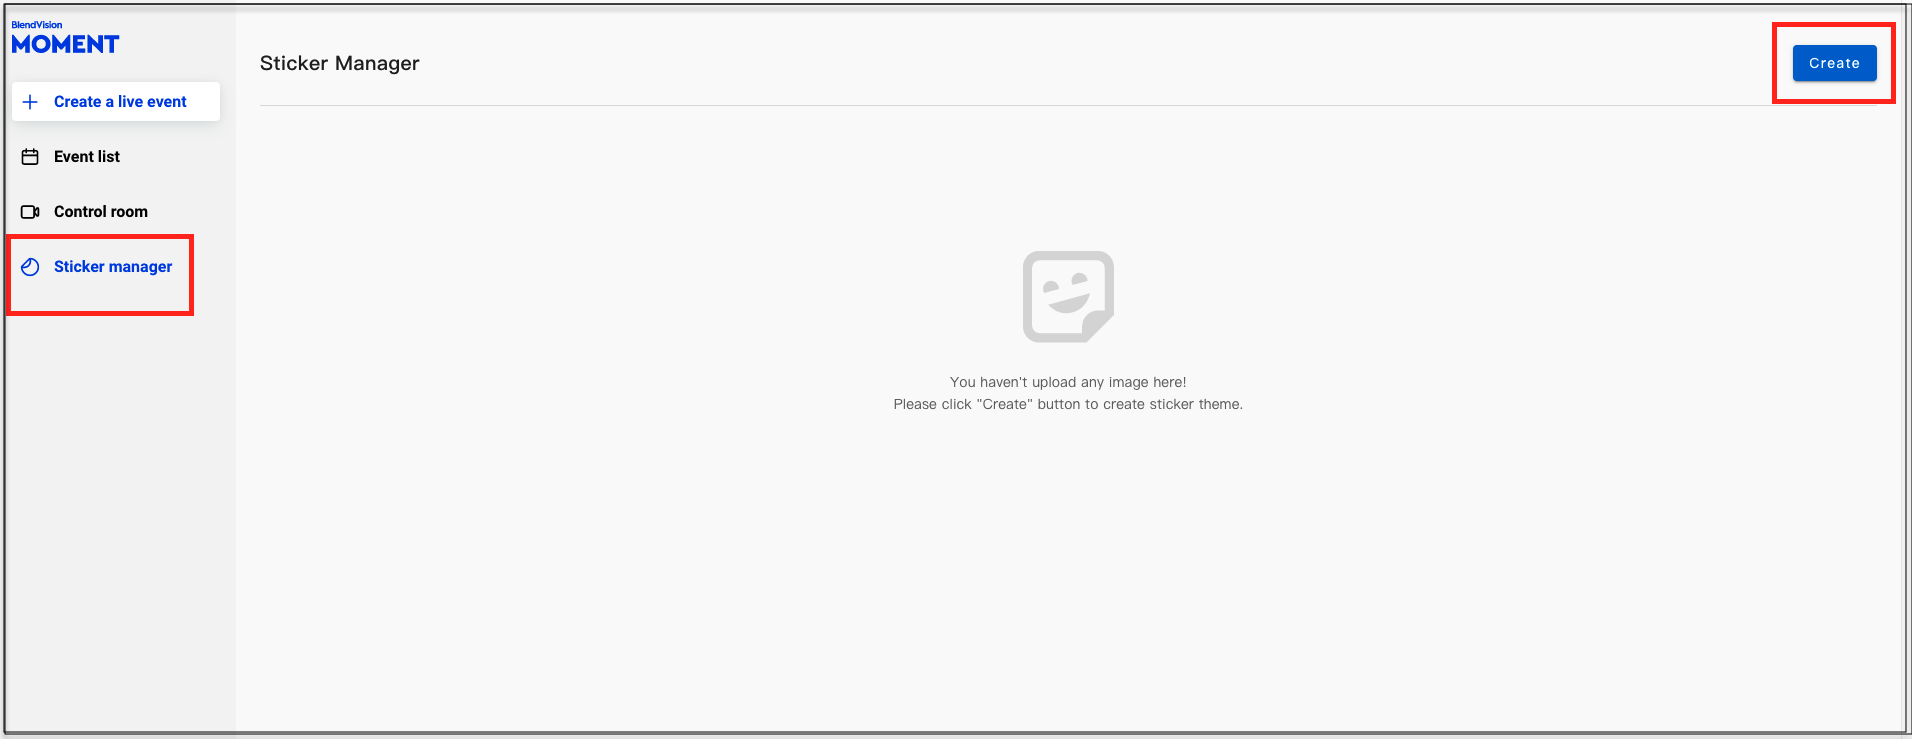
5. To upload custom stickers, go to "Sticker managers" in the left sidebar. Click "Create" button to start adding a new group of custom stickers.
- Custom sticker group format:
- Up to 24 stickers for each group
- PNG image only
- Maximum size for each image: 1MB
- Resolution: H240 x W240
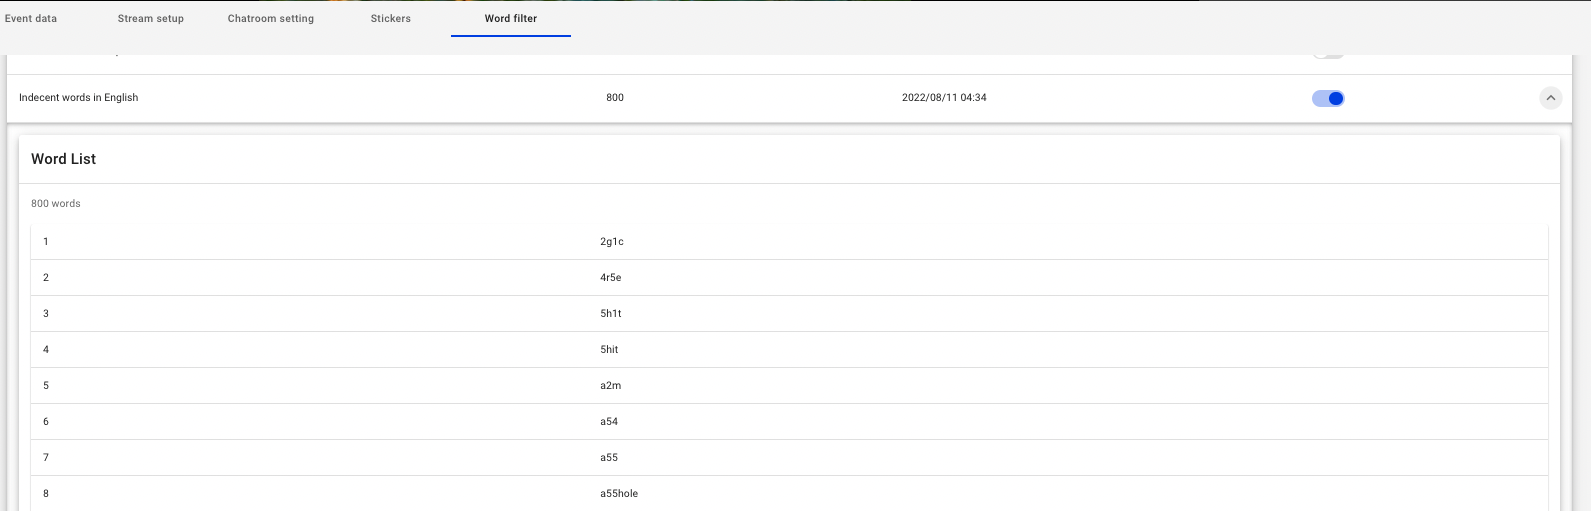
- Enable/disable word-filter in the control room
Select the Word Filter tab on the panel, and you can see all the available dictionaries of sensitive words are listed. You can activate the dictionary to detect and block the words listing in it.
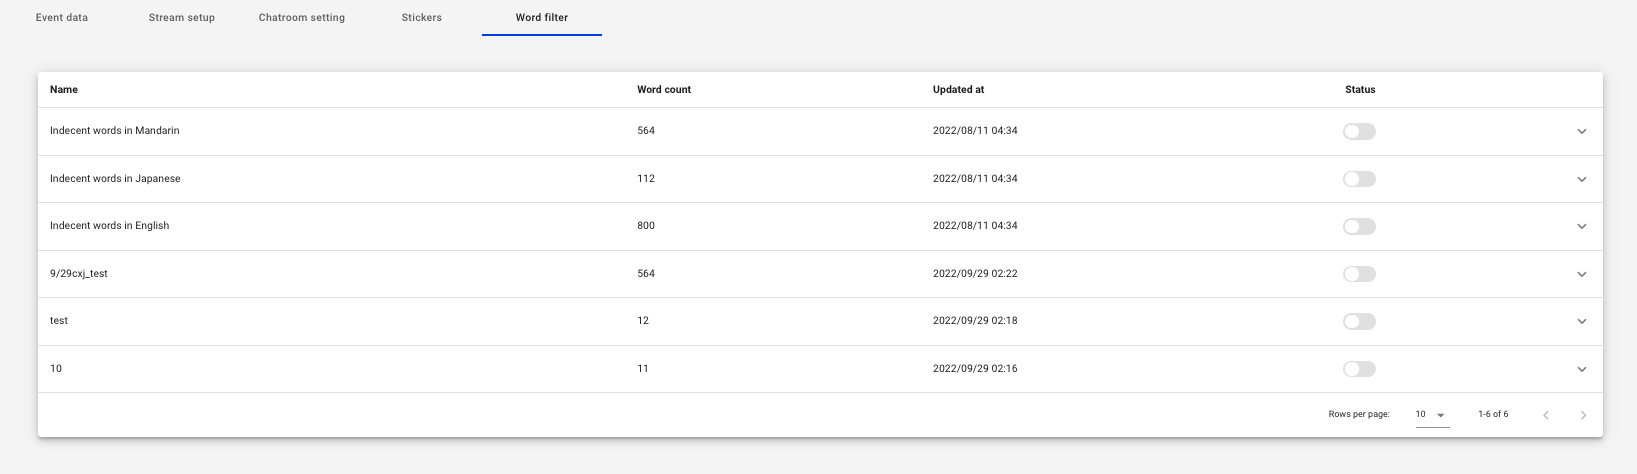
Once the dictionary is enabled, it takes around 1 minute to activate, after that, the words in the dictionary would start to be blocked by our filter.